I often get asked how to adapt a barefoot or minimalist shoe progression for different foot shapes. Flat feet, high arches, and wide feet each present different mechanics and comfort needs — and while the principles of gradual exposure and strengthening are the same, the practical steps change. Below I share what I’ve learned from studying movement, testing routines, and working through my own foot experiments. I’ll offer simple progressions, footwear and orthotic suggestions, exercises, and signs to watch for so you can adapt safely and confidently.
Why foot shape matters for a barefoot progression
Foot shape influences how load is distributed, how the foot moves, and which tissues do most of the work. A barefoot progression asks your intrinsic foot muscles, plantar fascia, and lower-leg stabilizers to take on new demands. If your feet are flat, high-arched, or wide, that demand will feel different and may require tweaks to volume, exercise selection, and shoe choice.
Think of a barefoot progression like building a habit: you need the right starting point (shoes and support), short, repeatable drills (mobility and strength), and incremental increases in time and intensity. Here’s how to adapt that framework by foot type.
Flat feet (low arch)
People with flat feet tend to pronate (the foot rolls inward) more and often rely on soft tissue (like the plantar fascia and tibialis posterior) rather than the arch’s passive spring. That doesn’t mean you should avoid barefoot work — it means you should progress with targeted strengthening and controlled exposure.
Progression tips:
- Start with stable surfaces: Begin on firm, even ground like indoors on hardwood or a yoga mat. Avoid uneven or very soft surfaces at first, which can encourage over-pronation.
- Short, frequent sessions: 5–10 minutes of barefoot standing and gentle movement twice daily is better than one long session. Increase by 2–3 minutes every week if you feel comfortable.
- Work on arch lifting: Practice short foot intrinsic exercises like the “short foot” (drawing the ball of the foot toward the heel without curling toes) and seated arch lifts. Hold 3–5 seconds, 10–15 reps.
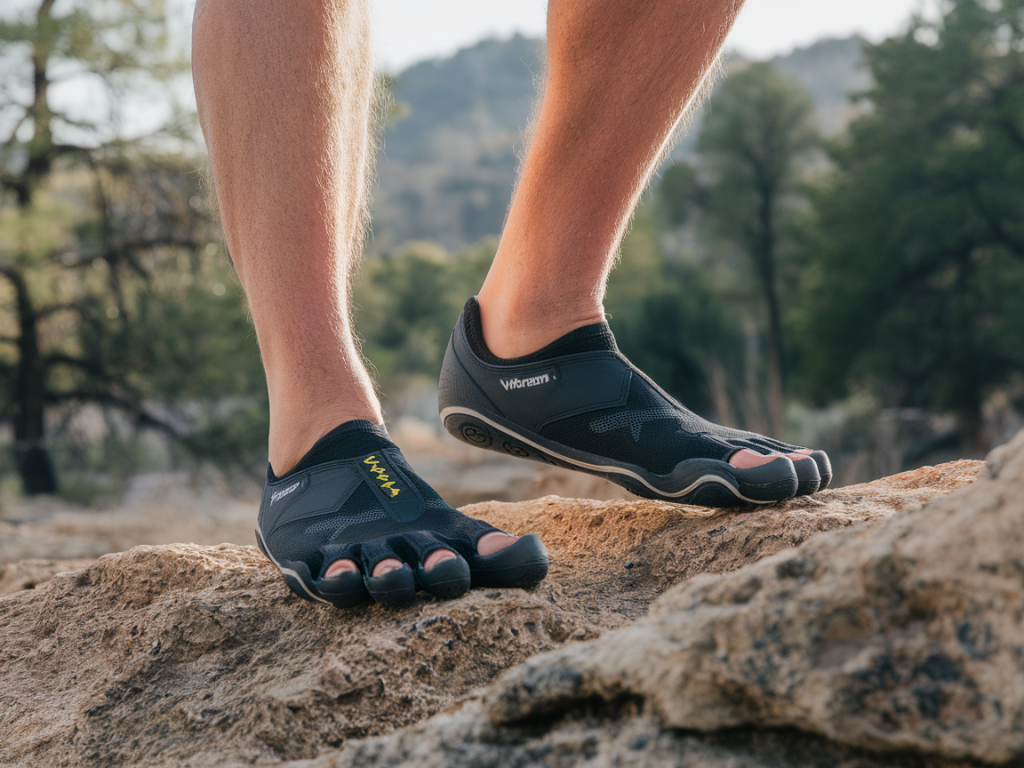
- Introduce minimalist shoes with mild support: If fully barefoot is uncomfortable, use low-drop, flexible shoes with a slightly firmer midsole (for example, Topo Athletic or Altra models with roomier toe boxes but modest cushioning).
Helpful exercises:
- Short foot activation while seated and standing
- Heel raises with emphasis on a slow eccentric (3–4 seconds down)
- Single-leg balance with small knee flexion, eyes open → eyes closed as you progress
Orthotics and modifications:
If you have symptomatic over-pronation or posterior tibial tendon issues, a temporary supportive insole or over-the-counter orthotic (e.g., Superfeet or an off-the-shelf medial arch support) can help during the early weeks while you strengthen. The goal is to phase down reliance as muscular control improves.
High-arched feet (rigid, cavus foot)
High arches are generally more rigid and unload energy less efficiently. The foot can be supinated, which stresses the lateral forefoot and decreases shock absorption. For high-arched feet, increasing shock tolerance and ankle mobility is key.
Progression tips:
- Focus on cushioning and controlled impact initially: If you’re transitioning from supportive trainers, move first into minimal shoes that still offer some cushioning rather than fully barefoot on hard ground.
- Gradual impact exposure: Start with barefoot walking inside and on soft grass for balance and proprioception work. Introduce short bouts of walking on harder surfaces once your calves and plantar fascia start to feel stronger.
- Increase ankle dorsiflexion: Limited ankle movement often accompanies high arches; work on calf stretches, ankle mobilizations, and wall calf stretches to improve range.
Helpful exercises:
- Calf eccentrics and soleus-focused heel raises
- Toe spreading and dorsiflexion with toe extension to load intrinsic muscles
- Controlled hopping drills on soft surfaces (low amplitude) to improve shock tolerance
Orthotics and modifications:
People with high arches may benefit from cushioned insoles or inserts that distribute pressure more evenly (for example, energy-absorbing insoles from brands like Superfeet Thin or Dr. Scholl’s Sport). Avoid rigid supinatory devices unless prescribed by a clinician; aim to supplement rather than over-correct while you build tissue resilience.
Wide feet
Wide feet need room to splay and distribute pressure across the forefoot. Many minimalist shoes are too narrow and can cause pain, blisters, or mechanical compensation. The main adaptation here is choosing footwear that respects your width while still allowing natural foot function.
Progression tips:
- Choose roomy toe boxes: Look for brands that offer wide lasts or natural toe splay like Topo, Altra, Vivobarefoot (some models), or New Balance wide options. A shoe that pinches will derail progress.
- Start with walking and controlled movements: Wide feet often accommodate balance work well, so begin with standing and walking barefoot or in roomy minimal shoes before introducing dynamic single-leg or running drills.
- Protect the skin: Because toes may rub as they adapt, consider thin toe socks or gradual wear time to avoid blisters.
Helpful exercises:
- Toe spreading and marble pickups to encourage forefoot control
- Short-foot activation with the toes allowed to splay naturally
- Lateral stepping and band-resisted abduction to strengthen the foot’s stabilizers
Orthotics and modifications:
A custom orthotic isn’t always necessary — often a wide, flexible insole that doesn’t compress the toes is sufficient. If you have painful metatarsal stress or bunions, consider a metatarsal pad or cutaway insoles that reduce pressure on sensitive areas.
Common signs you’re progressing too quickly (red flags)
- Persistent increase in pain (not just muscle soreness) after 48–72 hours
- Sharp, localized pain under the heel or along the medial ankle — could indicate tendon overload
- New numbness or tingling
- Swelling that doesn’t settle with rest
If you see these signs, back off by 30–50% in time/intensity for a week, return to supportive footwear, and focus on mobility and low-load strengthening. If symptoms persist, see a healthcare professional.
Practical weekly plan to adapt progressions
| Week | Activity focus | Duration / Notes |
|---|---|---|
| 1–2 | Standing barefoot, short-foot drills, calf mobility | 5–10 min twice daily, gentle |
| 3–4 | Short walks barefoot/minimal shoes, heel raises, toe exercises | 10–20 min once daily, add single-leg balance |
| 5–8 | Longer walks, low-impact dynamic work (lateral steps, small hops) | 20–40 min, 3× per week; increase complexity slowly |
| 8+ | Progress to activity-specific tasks (running, hiking) if comfortable | Gradually add mileage or time, monitor symptoms |
Adapting a barefoot progression for your foot shape is about matching exposure to capacity. Be patient, prioritize quality of movement, and use footwear and temporary supports wisely while you build strength. If you’d like, tell me which foot shape you think you have and what shoes you currently use — I can help design a more specific 8-week plan tailored to you.