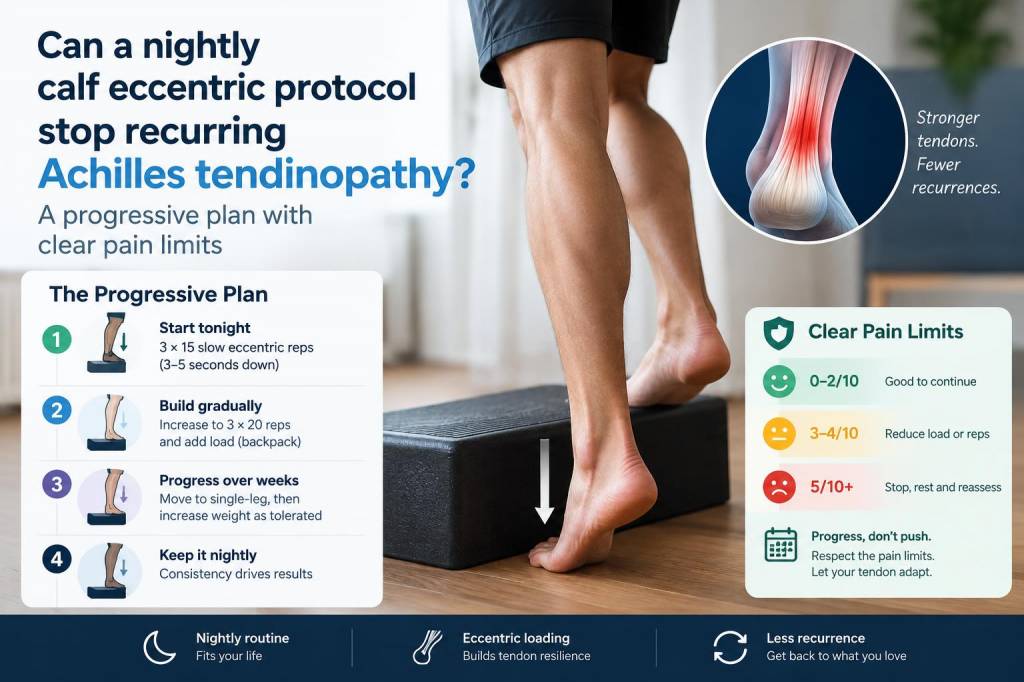
I’ve treated and lived with my own share of stubborn lower-leg niggles, so when I started researching ways to manage recurring Achilles tendinopathy I kept coming back to one practical, well-studied approach: a nightly calf eccentric protocol. Over the years I’ve adapted this into a progressive, realistic plan I use with myself and recommend to readers and clients. Below I share the how, the why, and the exact progression I use — with clear pain limits and recovery guidance so you can try it safely at home.
Why eccentric loading helps Achilles tendinopathy
Eccentric exercises are movements where the muscle lengthens under load — for the calf that’s the lowering phase of a heel drop. Research shows that controlled eccentric loading can improve tendon structure, reduce pain, and restore function in many people with mid-portion Achilles tendinopathy. The mechanism isn’t magic: the repeated, controlled strain encourages tendon remodeling and improves the capacity of the calf-Achilles unit to handle load.
Importantly, eccentric work is best delivered in a progressive, pain-informed way. Too aggressive and you can inflame the tendon; too timid and you won’t create the stimulus needed for adaptation.
Who this protocol is for (and who should get medical advice)
This nightly eccentric protocol is intended for people with chronic or recurring mid-portion Achilles tendinopathy — the classic “pain 2–6 cm above the heel bone,” typically aggravated by activity and relieved by rest. If you have a recent, sharp traumatic injury, a suspected rupture, active infection, severe swelling, or progressive neurological symptoms, seek medical assessment before trying an exercise protocol.
How I structure the nightly protocol
I recommend performing this routine in the evening because tendons tolerate eccentric loading better later in the day for many people, and making it part of a bedtime routine improves adherence. The core elements are:
Clear pain rules I use and recommend
Managing pain is central. I use simple, practical pain limits that you can monitor:
Progressive nightly plan (8–12 week outline)
I’ve created a simple progression table you can follow. Increase one variable at a time — reps, load (weight), or tempo — and only progress if pain rules are respected.
| Week | Reps x Sets | Load | Tempo | Notes |
|---|---|---|---|---|
| 1–2 | 3 sets of 10 | Bodyweight | 3s descent, 1s lift | Two-legged to single-leg partial if needed |
| 3–4 | 3 sets of 12 | Bodyweight → small backpack (1–3 kg) | 4s descent, 1s lift | Start single-leg when comfortable |
| 5–6 | 4 sets of 12–15 | Increase load gradually (add 1–2 kg) | 4–5s descent | Prioritize quality over quantity |
| 7–8+ | 4 sets of 15 | Progress to heavier load as tolerated | 3–4s descent, controlled | Begin plyometric prep only if pain-free |
Notes on the table: the eccentric phase is the lowering from the high-heel (raised) position to the ground. The concentric (raising) phase can be assisted by the other leg or performed with a quicker push if using Alfredson-style protocol variations.
How to perform the basic single-leg eccentric heel drop
I prefer the classic standing heel-drop because it’s easy and effective. Here’s my step-by-step:
Modifications and variations
Not everyone can perform a painful single-leg lowering at first. I often use these modifications:
Recovery strategies I pair with the protocol
Exercise is only part of the program. I recommend pairing eccentric work with:
When to introduce higher-load or plyometric work
Once you can do the prescribed eccentric sets with minimal pain and your functional tasks (walking, stairs, short jogs) are comfortable, introduce heavier, faster work cautiously. I recommend:
Red flags and when to see a clinician
Stop and consult a clinician if you notice:
Practical tips that improved my adherence
What helped me stick with an evening routine:
If you want, I can create a printable 8-week tracker for this protocol or a version tailored to runners. On onepairoffeet.co.uk I’ve also shared videos demonstrating form and progressions — reach out if there’s a specific variation you’d like me to film.