I’ve spent a lot of time testing gear for long hikes, and if there’s one piece of kit people underestimate, it’s socks. The right walking sock can be the difference between enjoying a sixteen-mile day and spending the last quarter-hour nursing a hot spot or blister. In this piece I’ll walk you through which types of socks actually reduce blister risk, what to look for in materials and construction, and a practical one-day test you can use to evaluate socks before you commit to wearing them on a long trek.
Why socks matter more than you think
Most blisters form from friction and moisture. When skin is warm and damp, it becomes much more prone to friction damage. So even the best boots or shoes won’t save you if your socks are doing the wrong thing: holding moisture against your skin, bunching, slipping, or creating seams in high-friction zones.
I always start with the principle that a good hiking sock manages three things: moisture, friction, and fit. If a sock helps wick sweat away from the skin, reduces internal movement between layers, and matches the shape of your foot without excess bulk or tight spots, you’re already ahead.
Materials and construction that actually help
Here are the features I look for and why they matter:
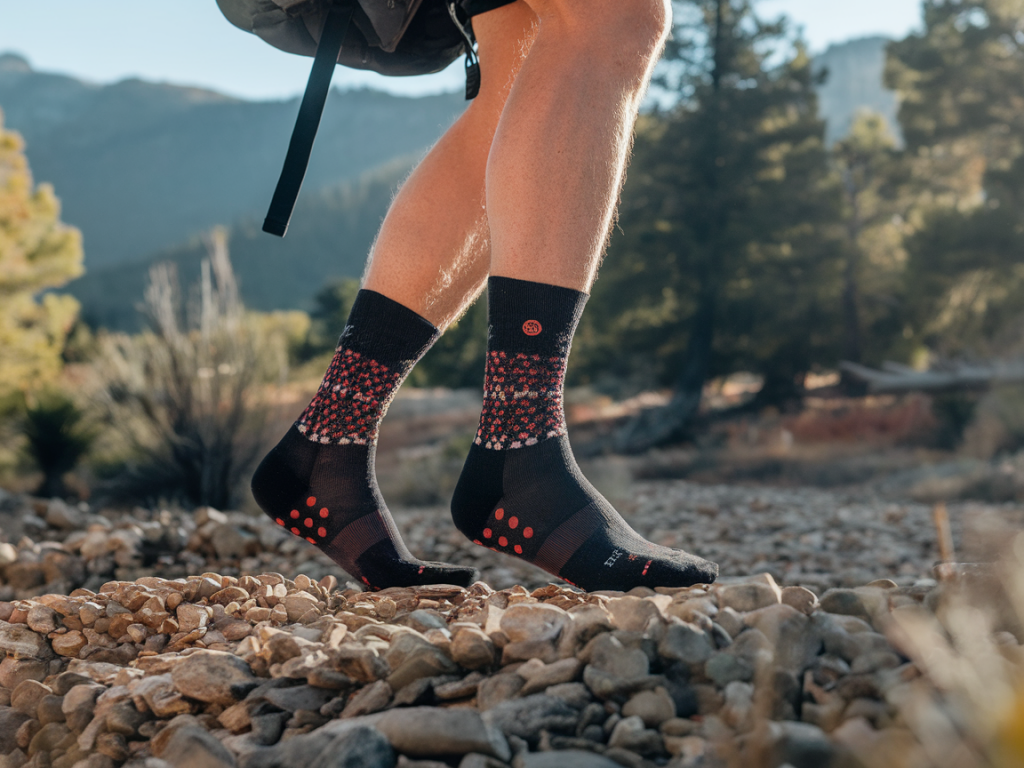
Merino wool or blended merino — Merino is naturally moisture-wicking, odor-resistant, and stays warm when damp. Pure wool is soft, but blended socks (merino + synthetics) often give better durability and moisture transport for long hikes.Technical synthetics (polyester, nylon, polypropylene) — These materials move moisture quickly and dry fast. They’re often used in combination with merino to improve strength and wicking.Seamless or low-profile seams — Seams at the toes or underfoot can become pressure points. Good walking socks minimize seams in these areas.Double-layer or padded zones — Some socks have a double-layer construction that reduces skin-on-sock friction by letting the outer layer move relative to the inner layer. Targeted padding in the heel and forefoot can reduce pressure and shear.Compression/arch support — Gentle compression around the arch stabilizes the foot and reduces internal movement that causes hot spots.Fit and sizing — A sock that’s too big will bunch; too small will constrict circulation and create hotspots. Fit matters as much as fabric.Which sock types work best in practice?
Over the years I’ve found three categories that repeatedly reduce blister risk on long days:
Merino-blend hiking socks — Lightweight to midweight merino blends (about 50–70% merino with synthetic reinforcements) are my go-to for multi-day or long single-day hikes. They balance comfort, odor control, and moisture management. Brands I’ve used often: Smartwool Hike, Darn Tough Hiker, and Bridgedale.Double-layer socks — Brands like Wrightsock pioneered the double-layer idea, and the concept works: the inner layer moves with your foot while the outer layer moves with the shoe, reducing friction at the skin. These are particularly good if you’re susceptible to hot spots.Coolmax/technical synthetic socks — For hot-weather hikes or fast-paced treks where sweat production is high, socks with high synthetic content (e.g., Coolmax blends) excel at wicking moisture away quickly. They can feel less plush than merino but keep feet drier which prevents blistering.What I don’t recommend
Avoid cotton socks for hiking. Cotton holds moisture and increases friction when wet. Also be skeptical of thin socks without any structure if you weigh more or take long days — they can cause pressure points inside boots.
How to run a one-day sock test: a protocol I use
You shouldn’t wait for a multi-day trip to learn a sock is problematic. Here’s a repeatable, one-day test you can do on a long walk (2–6 hours) that replicates key stresses of a long hike.
Step 1 — Choose test conditions: Use the shoes/boots you plan to hike in and the same insole if you use one. Wear the socks you want to test paired with your usual lacing pattern and footwear.Step 2 — Wear the socks for a baseline walk: Start with a 30–60 minute walk on mixed terrain (pavement + grass/trail). This helps you notice initial fit issues: slipping, toe seam rub, or constriction.Step 3 — Increase intensity and duration: Do a 2–4 hour hike that includes elevation if possible. Aim for conditions that produce sweat: undulating trails, some hills, and varied surfaces. Take note of any hot spots as soon as they appear.Step 4 — Inspect periodically: Pause every 30–60 minutes to check for hot spots, dampness, and sock movement. If you feel any irritation, mark the area (mentally or with a small piece of tape) and don’t ignore it — small sensations escalate quickly.Step 5 — Try a change test: If a hot spot develops, stop and change to a different sock (a fresh pair of the same or a known good alternative) to see whether the problem is sock-specific or shoe-related. This helps isolate the cause.Step 6 — Evaluate at the end: After the full test, inspect your feet for hot spots, blisters, nail issues, and excessive swelling. Note where any friction occurred and whether it correlated with visible sock seams or padding areas.Quick checklist to grade the sock after your test
| Criteria | Good | Poor |
|---|
| Moisture control | Feet feel dry or only slightly damp | Socks saturated, feet squelchy |
| Fit | No bunching, no slipping | Bunching, heel slip, tight spots |
| Hot spots | None or minor | Persistent hot spots or blisters |
| Comfort over time | Consistent comfort for hours | Discomfort increases over time |
Practical tips to reduce blister risk beyond the sock
Ensure boots are properly fitted and broken in — sock choice can’t fix ill-fitting footwear.Carry at least one spare pair of socks and change into dry socks during long, wet days.Use lubricants (like Vaseline or specialized anti-chafe balms) cautiously — they can help but also attract dirt; test them in a short walk first.Consider using thin liner socks under a thicker hiking sock if you’re prone to blisters — liner + outer layer mimics the double-layer effect on a budget.Practice foot care: keep toenails trimmed, remove grit from socks and boots, and treat any hot spots immediately with blister patches or moleskin.I find running this one-day test is the fastest way to know whether a sock will survive a long hike. It’s also low-risk: you catch problems before you’re miles from the trailhead. Over time you’ll learn which materials and constructions your feet prefer. For me, a merino-blend with some light padding, low seams, and good arch support checks most boxes — but if you know you sweat profusely, prioritize high-performance synthetics or a proven double-layer sock.
If you’d like, I can recommend a short list of socks to consider based on your typical hiking conditions (weight, climate, boot type). Tell me whether you hike in hot climates, wet conditions, or carry a heavy pack, and I’ll tailor a few picks you can test with the one-day protocol above.