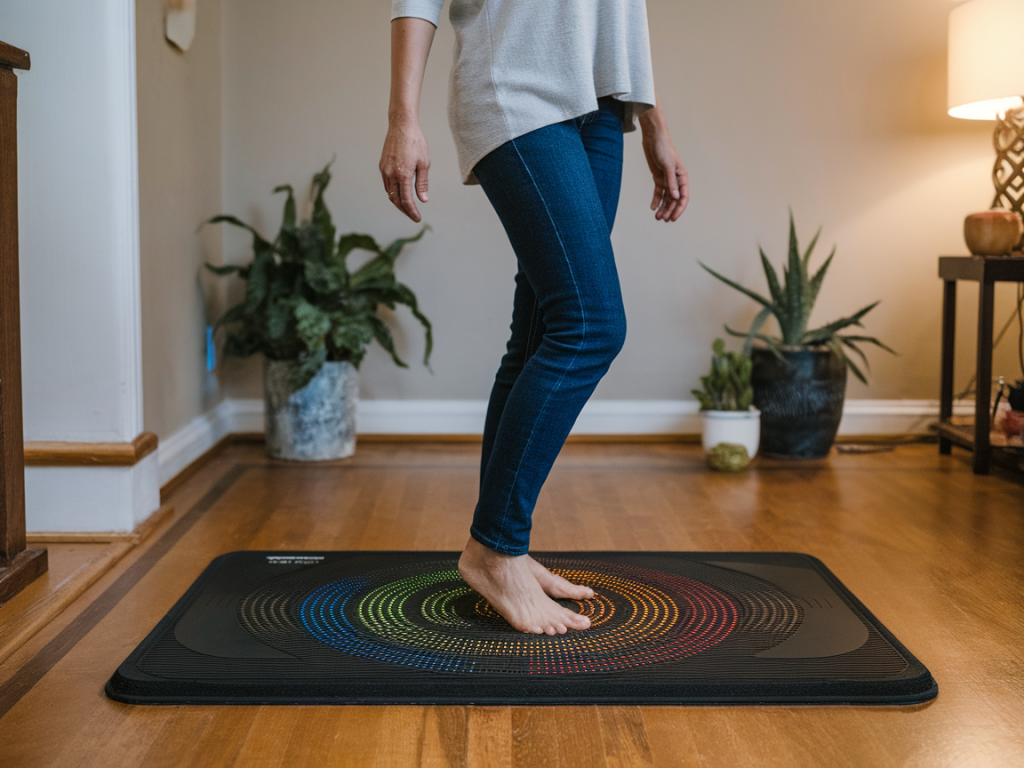
I started using a pedobarography mat at home because I wanted clearer, objective information about how my feet actually hit the ground. I’d been guessing at pronation, trying different insoles, and feeling uncertain whether a change helped. A simple pressure mat (sometimes called a pressure plate or gait mat) gives visual feedback that makes those guesses much more reliable. In this article I’ll walk you through how I use a home pedobarography mat to spot common gait faults and pick a more suitable insole, and I’ll share practical tips so you can do the same without getting overwhelmed.
What a pedobarography mat shows (in plain terms)
A pedobarography mat measures pressure distribution across your foot as you stand, walk, or run. The result is a coloured pressure map and numerical data showing where pressure is high or low, how long your foot stays in contact with the ground, and the path your centre of pressure (CoP) takes during a step. For most people at home, the most useful outputs are:
Static pressure map: how weight is distributed while standing.Dynamic pressure map: pressure during walking—where heel strike happens, midfoot contact, and push-off.Centre of pressure path: the line the pressure follows from heel to toe, which helps identify excessive pronation or supination.Contact time and peak pressure values: useful to see if a particular area—like the metatarsal heads or heel—gets excessive load.Setting up your mat and getting reliable readings
Accuracy starts with setup and consistent testing. I follow these practical steps every time:
Place the mat on a flat, non-slip surface away from direct sunlight (which can affect some sensors).Wear the clothes and footwear you normally use for the activity you’re testing—barefoot for general foot mechanics, or in the shoes you intend to use daily or for running.For walking tests, give yourself a short runway (about 2–3 metres) and walk naturally across the mat. Take several passes (I do 4–6) and use the average result to reduce variation.Stand still for static readings with weight evenly distributed. I look for asymmetries between left and right.Keep notes: date, footwear, activity (standing/walking/running), and any discomfort you felt during the trial.How I interpret common patterns
When I look at a pressure map I focus on a few visual cues and then confirm with numbers. Here are patterns I regularly see and how I interpret them:
Medial (inside) pressure concentration with an inward CoP curve: suggests overpronation. The arch collapses and pressure shifts medially through mid-stance.Lateral (outside) pressure concentration with a curved CoP that stays outside: suggests supination (underpronation). Shock absorption may be reduced.Forefoot-heavy map with high pressures at the metatarsal heads: indicates increased forefoot loading—this can occur with tight calves, shortened stride, or high-heeled footwear.Heel-only pressure with short CoP path: might mean reduced toe-off and weak intrinsic foot muscles or poor ankle mobility.Numbers to check: peak pressure zones (kPa or N/cm² depending on device), contact time in ms, and step length. I compare left to right—significant asymmetry (>10–15%) warrants closer attention.
Using the mat to choose the right insole
I use the mat twice when choosing an insole: first to establish a baseline, then to test potential insoles while wearing the same shoes. Try these steps:
Baseline: record static and walking maps barefoot and in your usual shoe. Note the main pressure areas and CoP path.Test candidate insoles: insert the insole and repeat the walking tests the same way. Look for reduced peak pressure in problem zones and a more neutral CoP path.Compare quantitatively: a good insole usually reduces localized peak pressures and distributes load more evenly across the foot. It may also shorten long contact times in problematic areas.Examples of what to look for:
If you had medial overload (overpronation), a firmer medial posting or stability insole should reduce the medial peak and move the CoP path slightly laterally.If you had lateral overload (supination), a cushioned insole with slightly higher medial forefoot support and softer lateral cushioning can encourage a more centred CoP.For forefoot pain (metatarsalgia), look for insoles with metatarsal pads or a forefoot rocker to offload pressure from the met heads. | Pressure Pattern | Likely Issue | Insole features to try |
| High medial pressure | Overpronation | Medial posting/stability, firmer arch support |
| High lateral pressure | Supination | Extra lateral cushioning, softer lateral wedge, flexible sole |
| Forefoot peak pressures | Metatarsalgia/short push-off | Metatarsal pad, forefoot rocker, thicker forefoot cushioning |
| High heel pressure | Poor shock absorption/heel strike issues | Cushioned heel insert, heel cup for stability |
Practical tips I use to get meaningful change
Test one change at a time: if you swap shoes and change the insole, you won’t know what helped.Give your feet time: adaptions can take 2–6 weeks; use the mat to track progress weekly.Combine insoles with exercises: strengthening the arch and improving ankle mobility often amplifies the benefits. I use short intrinsic foot exercises and calf mobility drills alongside insole changes.Use reliable hardware and apps: consumer mats from companies like Tekscan, Footscan, or lower-cost options like WalkinSense offer different levels of detail—choose one with repeatable metrics and clear visual output.When to involve a professional
I trust my mat for screening and iterative testing, but I recommend seeing a podiatrist or physiotherapist if you have:
Persistent pain despite reasonable changes.Major asymmetry or a history of falls or instability.Complex conditions like diabetic neuropathy, severe deformity, or recent surgery.A clinician can combine pedobarography with clinical assessment and, if needed, custom orthotics based on 3D foot models and gait analysis.
Using a pedobarography mat at home is empowering: it transforms hunches into data and helps you choose insoles that actually change how load is distributed through the foot. With consistent testing, small, evidence-informed changes, and a little patience, you can use the mat to prevent injuries, relieve pain, and make wiser footwear choices—one confident step at a time.